Learn how to clear your browser cache in Google Chrome easily and improve your browsing speed and security.
Clearing your browser cache is a good habit when you surf the web. The cache stores data from websites you’ve visited before, which helps load pages faster. But if the cache gets too full, it can actually slow down your browsing instead.
Not clearing your cache regularly can have negative consequences. It can slow down your browsing experience and make your data more vulnerable to security breaches. So, it’s important to start clearing your cache regularly to keep your browsing faster and your data safer.
When you clear your browser cache, you’re essentially deleting the stored data of previously visited websites. This allows your browser to start fresh and retrieve the latest versions of web pages when you visit them again. It helps improve your browsing speed because your browser doesn’t have to sift through old data.
Additionally, clearing your cache helps protect your data. If there’s a security breach or if someone gains unauthorized access to your device, they won’t be able to retrieve sensitive information from your cache.
How to clear browser cache on Google Chrome?
Clearing your browser cache on Google Chrome is a straightforward process that can help improve your browsing experience. Follow these simple steps to clear your cache:
1. Open Google Chrome on your computer.
Launch the Google Chrome application by clicking on its icon on your desktop or finding it in your applications menu.

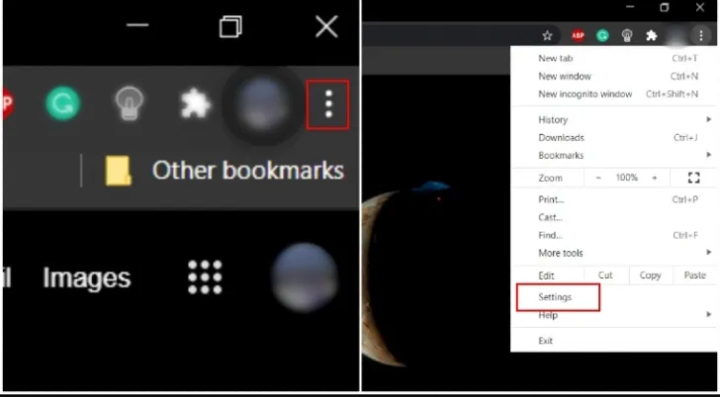
2. Click on the three-dot menu icon in the top-right corner of the browser window.
Look for a small icon with three vertical dots located at the top-right corner of the Chrome window. Click on it to open a drop-down menu. When it open, click on “Settings”.

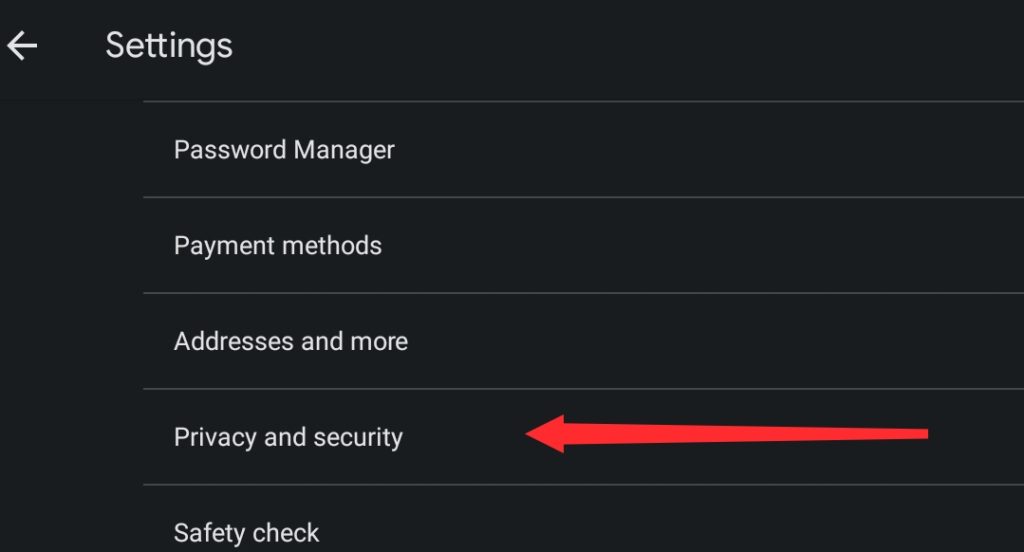
3. Look for the “Privacy & Security” or “Clear Browsing Data” option.
Within the settings or preferences section, search for an option related to privacy and security, or clearing browsing data. The wording may depend on the browser you are using.

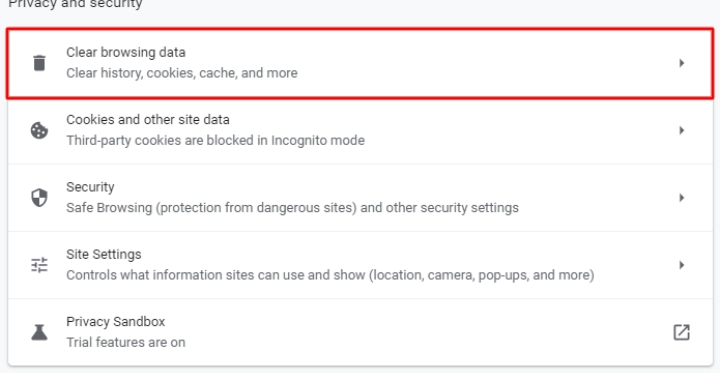
4. Click on the “Clear Browsing Data” or similar option.
Once you find the appropriate option, click on it to open the browsing data management screen.

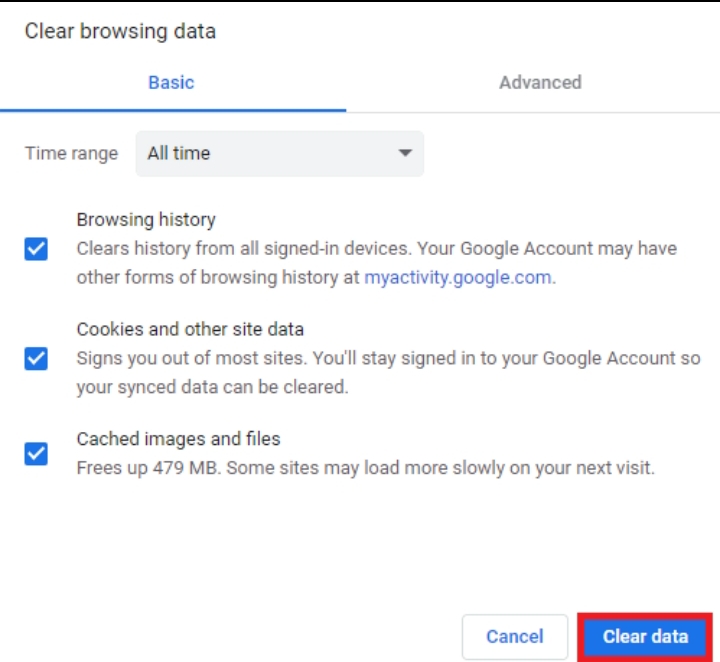
5. Select the types of data you want to clear.
On the browsing data management screen, you will see checkboxes next to different types of data, such as cache, cookies, browsing history, and more. Check the boxes next to “Cache” and “Cookies.
6. Choose the time range or select “All Time” to clear everything.
Depending on your browser, you may have the option to choose how far back you want to clear the data. If you want to remove all cached data and cookies, select the option that says “All Time”.

7. Click on the “Clear” or “Delete” button.
Once you have made your selections, find the button that says “Clear” or “Delete” and click on it to initiate the clearing process.

8. Wait for the process to complete.
The browser will start removing the selected data, including the cache and cookies. This may take a few seconds or longer, depending on the amount of data being cleared.
9. Once the process is complete, your browser’s cache and cookies will be cleared.
After the clearing process finishes, your browser will have a clean cache and no stored cookies. This can result in improved browsing performance, updated web content, and potentially enhanced privacy.


Leave a Review